Digitisation
Quick start guide
1. Marker template
A marker template defines the number, type and size of marker to be used in the digitisation process. To create a new template, click on New in the Marker Config Library. This launches the Marker Config window.
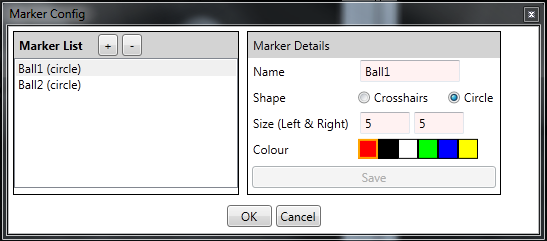
Click on + to add a new marker, and edit the details as appropriate. For the sample images you will need two circle markers. Make them different colours but leave the default size for the left and right image as 5 (you can change this later). Remember to click Save to apply the changes.
Click OK when all markers have been defined.
2. Analysis setup
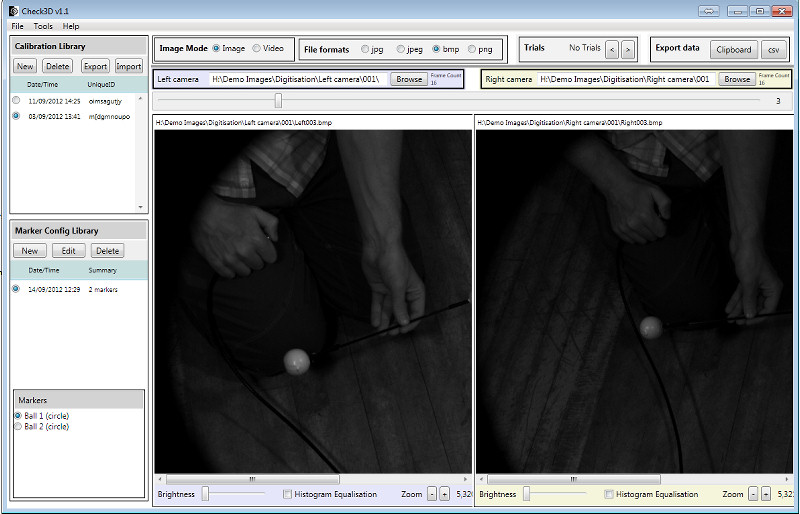
Select the relevant calibration and marker template from the Calibration Library and Marker Config Library respectively.
Select the correct file format for the images. Either:
- Browse to the left hand camera images using the Browse button
- Drop the folder on to the textbox next to the Browse button
Repeat this operation for the right camera.
The relevant folder paths for the sample images are shown in the screenshot below.
Notes:
-
For a description of the shortcut keys click Help-Show
shortcut keys.
-
To change the size of the marker click keys A or
Z (increase or decrease respectively). The
marker size can be different in the left and right images.
- To digitise a single frame:
- Select Ball1 marker
- Click on left ball in left image and left ball in right image
- Select Ball2 marker
- Click on right ball in right image and right ball in right
image
- There are two export options:
- Export to clipboard
- Export to csv - specify location of csv file
- The export lists the XYZ position of the markers, relative to
the Origin system set up in the calibration phase.
The balls should be 315 mm apart in the sample images.
- Use either the Brightness slider or the
Histogram Equalisation option to enhance the images to make
them easier to analyse if required.
- The selected marker can be auto advanced by selecting
Tools-Auto advance marker .
- Marker names can be shown in the digitisation panel by selecting
Tools-Show marker name .